Showing posts with label Soy Free. Show all posts

Sunday, November 10, 2013

Potato Pancakes

Speaking of creamed potatoes, I am also a big fan of Potato Pancakes (recipe follows). The tender brown crust is absolutely divine. Using this recipe as a follow on to the Creamed Potato Casserole (click for recipe) is a perfect example of cook once, but eat two or more times. Since the pancakes have to be made from cold creamed potatoes, simply make enough creamed potatoes the first time. Besides, creamed potatoes will easily keep three to four days in the refrigerator if kept in a sealed container.

Here is my recipe:
4 large red potatoes peeled and cut into 1/2-inch cubes
2 cups water or enough to cover cubes potatoes
2 tablespoons butter (no substitutes)
1/4 cup heavy (whipping) cream, at room temperature

Here is how I make these pancakes:
1. Place pealed, cubed potatoes in large sauce pan. Cover with water, about  2 to 3 cups. Add butter. Turn heat to medium high; bring to a boil and reduce heat to medium-low.

2. Boil for 25 to 35 minutes or until potatoes are very soft. Remove from heat and drain. Add room temperature heavy cream; using an electric hand mixer, whip potatoes until creamed.

3. Place creamed potatoes in refrigerator until chilled completely, usually four hours to overnight.

4. To make pancakes, shape 1/4 cup chilled creamed potatoes into a thin pancake. Place pancake into a non-stick skillet over medium-high heat. Allow to cook about 3 to 4 minutes. Using a wide spatula, flip the pancake and cook another 3 to 4 minutes.

5. Repeat process until all pancakes are cooked.

Author's Notes:

1. Number of pancakes you can cook at one time depends on size of pan and the skill level of the person cooking the pancakes.

2. Work quickly, leaving uncooked pancakes in refrigerator until ready to be put into the skillet.

Servings: 8

Preparation Time: 30 minutes
Cooking Time: 1 hour and 20 minutes
Total Time: 1 hour and 50 minutes

Nutrition (per serving): 133 calories, 50 calories from fat, 5.6 g total fat, 17.8 mg cholesterol, 10.3 mg sodium, 569 mg potassium, 19.5 g carbohydrates, 1.3 g fiber, 1 sugar, 2.2  protein.

Recipe Type: and Grains, Brunch, Corn Free, Gluten Free, Peanut Free, Potatoes, Side Dish, Soy Free, Tree Nut Free, Vegetarian

Author: Dr. Jacquelyn P. Horne

Copyright: 2013
Potato Pancakes

Speaking of creamed potatoes, I am also a big fan of Potato Pancakes (recipe follows). The tender brown crust is absolutely divine. Using this recipe as a follow on to the Creamed Potato Casserole is a perfect example of cook once, but eat two or more times. Since the pancakes have to be made from cold creamed potatoes, simply make enough creamed potatoes the first time. Besides, creamed potatoes will easily keep three to four days in the refrigerator if kept in a sealed container.
Here is my recipe:
4 large red potatoes peeled and cut into 1/2-inch cubes
2 cups water or enough to cover cubes potatoes
2 tablespoons butter (no substitutes)
1/4 cup heavy (whipping) cream, at room temperature

Here is how I make these pancakes:
1. Place pealed, cubed potatoes in large sauce pan. Cover with water, about  2 to 3 cups. Add butter. Turn heat to medium high; bring to a boil and reduce heat to medium-low.

2. Boil for 25 to 35 minutes or until potatoes are very soft. Remove from heat and drain. Add room temperature heavy cream; using an electric hand mixer, whip potatoes until creamed.

3. Place creamed potatoes in refrigerator until chilled completely, usually four hours to overnight.

4. To make pancakes, shape 1/4 cup chilled creamed potatoes into a thin pancake. Place pancake into a non-stick skillet over medium-high heat. Allow to cook about 3 to 4 minutes. Using a wide spatula, flip the pancake and cook another 3 to 4 minutes.

5. Repeat process until all pancakes are cooked.

Author's Notes:

1. Number of pancakes you can cook at one time depends on size of pan and the skill level of the person cooking the pancakes.

2. Work quickly, leaving uncooked pancakes in refrigerator until ready to be put into the skillet.

Servings: 8

Preparation Time: 30 minutes
Cooking Time: 1 hour and 20 minutes
Total Time: 1 hour and 50 minutes

Nutrition (per serving): 133 calories, 50 calories from fat, 5.6 g total fat, 17.8 mg cholesterol, 10.3 mg sodium, 569 mg potassium, 19.5 g carbohydrates, 1.3 g fiber, 1 sugar, 2.2  protein.

Author: Dr. Jacquelyn P. Horne
Copyright: 2013


Creamed Potato Casserole


Cooler weather calls for “stick-to-your-ribs” comfort food. When I ran across this recipe, I knew I had to try it. With a little tweaking and putting my spin on it, I am sharing my Creamed Potato Casserole (recipe follows).
I am a huge fan of creamed, not mashed, potatoes anyway. I shared how I make my creamed potatoes. Please note: if this particular step is replaced with instant potatoes or mashed potatoes, the results will be very different and not as—well—creamy.
Back to the point at hand, this particular dish just hit the spot with me. When you add cheese to creamed potatoes, well what can I say other than “Bring them babies on”. Another thing I especially enjoy about this dish is that it can be assembled, but not cooked, one day prior. Just be sure to allow casserole to come to room temperature before baking.
For those of you concerned about the calories or trying to cut back on casein in your diet, you might want to use low-fat milk or vegetable based milk. The taste, however, will not be the same.
Here are my recipes & how I put these together:
Creamed Potatoes:
4 large red potatoes peeled and cut into 1/2-inch cubes
2 cups water or enough to cover cubes potatoes
2 tablespoons butter (no substitutes)
1/4 cup heavy (whipping) cream, at room temperature

1. Place pealed, cubed potatoes in large sauce pan. Cover with water, about  2 to 3 cups. Add butter. Turn heat to medium high; bring to a boil and reduce heat to medium-low.

2. Boil for 25 to 35 minutes or until potatoes are very soft. Remove from heat and drain. Add room temperature heavy cream; using an electric hand mixer, whip potatoes until creamed.

Casserole:
2 cups creamed potatoes
1/2 cup sour cream at room temperature
4 ounces cream cheese, cut into 1/2-inch cubes, softened to room temperature
1 teaspoon dried chives
1/4 teaspoon garlic salt, with parsley
1/4 cup gluten free bread crumbs
1 tablespoon butter, melted
1/3 cup four cheese blend, room temperature

1. Preheat oven to 350 degrees Fahrenheit. Spray a1-quart casserole with gluten free non-stick cooking spray; set aside.

2. Place creamed potatoes, sour cream, cream cheese, chives, and garlic salt in a large mixing bowl. Use a wooden spoon to combine. Spoon into prepared casserole dish.

3. Combine butter and bread crumbs; sprinkle over creamed potato mixture.

4. Place uncooked casserole on aluminum baking sheet; place in preheated oven. Bake 50 to 60 minutes.

5. Remove from oven. Reposition rack to the top and turn oven temperature to broil. Sprinkle with four cheese blend; broil 3 to 5 minutes or until cheese begins to melt and brown lightly. Remove and serve immediately.

Servings: 6

Author’s Note: I keep bread crumbs that I made in my freezer at all times. Just bake a couple of loaves of your favorite bread, place in your food processor and about 30 of seconds later, you will have plenty of bread crumbs on hand for use when you need them. If you are short on time, a loaf of store bought certified gluten free bread will also work—just more expensive.

Oven Temperature: 350°F

Preparation Time: 30 minutes
Cooking Time: 1 hour and 20 minutes
Total Time: 1 hour and 50 minutes

Nutrition (per serving): 406 calories, 216 calories from fat, 24.6 g total fat, 64.5 mg cholesterol, 354 mg sodium, 926.6 mg potassium, 41 g carbohydrates, 2.9 g fiber, 2.8 g sugar, 7.4 g protein.
  
Author: Dr. Jacquelyn P. Horne
Copyright: 2013

Thursday, October 17, 2013

Spicy Mango Salsa


Want a pretty, elegant topping that is good with just about any fish or meat? I have the solution for you. My Spicy Mango Salsa has just enough kick to tantalize the taste buds without over powering the entrée yet retains its refreshing quality.

This salsa is also good with 100% gluten free corn tortilla chips. And, the caloric count is lower because less is eaten per person than when served as a topping.

Just use your imagination. One more thing—this salsa/topping is free of all recognized allergens plus gluten. Now, I would call this one a winner!

Hot Crab Dip (Adapted from Hannah Flanagan’s Irish Pub)


This is probably the most successful as well as the most requested dip I make. Seldom is any left. I especially like to serve this elegant dip during the cooler season of the year. Warm on the inside is just plain better when the cooler winds of winter blow.

As elegant as it is delicious, my Hot Crab Dip (recipe follows) makes a real statement at holiday gatherings, or at anytime I want to impress my guests. Just be sure none of your guests have a shellfish allergy. That is a big oops! No one wants to drag out their Epipen.

Friday, October 11, 2013

Roasted Vegetable Frittata


Love, love, love . . .  this wonderfully easy gluten free side dish. This hummer makes a huge dish. For me, that means I can divide into two halves, freezing one-half for later use or give to someone from my church who is shut in or sick. Pretty cool and yummy stuff, huh?

Don't like zucchini? No problem! Pick a veggie YOU like; slice/chop into a similar size and follow the same procedure. The results should be the same.

Roasted Brussels Sprouts with Bacon and Mustard Vinaigrette


Creating an easy, tasty and very elegant side dish is easier than you might think. Brussels sprouts receive a bad rap, but given a fair shake, these may become your “go-to” favorite side dish. They are mine! This particular recipe, Roasted Brussels Sprouts with Bacon and Mustard Vinaigrette (recipe follows), is free of all the recognized allergens plus gluten.

Tell me! Doesn’t get much better than that, now does it?

Mini Spinach Frittatas

With the holiday season right around the corner, it is not too early to stock up on party foods. My recipe for Mini Spinach Frittatas (recipe follows) is naturally gluten free—no converting necessary. Just make, serve and watch them disappear. These are like little bite-sized crustless quiches. If you want to make these little guys a day ahead, they reheat in the microwave really well and make great little breakfast bites to take along on trips any time of the year.

Here is my recipe:
1 cup ricotta cheese
3/4 cup Parmesan cheese freshly grated
2/3 cup mushroom, finely chopped
1 10-ounce package frozen spinach, thawed & squeezed dry
1 large egg, slightly beaten
1 teaspoon fresh oregano, finely chopped, or 1/2  teaspoon dried oregano
1/4 teaspoon salt
24 1 3/8-inch slices pepperoni slices
Fresh oregano sprigs
Here is how I made these little frittatas:
1. Preheat oven to 375 degrees Fahrenheit. Spray 24 miniature muffin cups with non-stick cooking spray.
2. Place ricotta cheese, Parmesan cheese, mushrooms, spinach, egg, oregano and salt in a large mixing bowl. Stir with a wooden spoon to thoroughly combine all ingredients; set aside.
3. Place one slice of pepperoni into the bottom of each muffin cup. Fill each muffin cup three-fourths full with cheese mixture. Place filled muffin tin in center of baking sheet.
4. Place baking sheet in preheated oven and cook for 20-25 minutes or until a toothpick inserted into the middle comes out clean. To remove frittatas from muffin tins, carefully run knife blade around edges of muffin cup to loosen. Serve warm with sprigs of fresh oregano.
Servings: 12             Yield: 24
Author: Dr. Jacquelyn P. Horne
Copyright: 2013


Saturday, September 28, 2013

Peppermint Jelly


With the end of summer past and my herbs getting leggy, I gave them a good haircut, laying the leaves out to dry. Once dried, I grind and store them in sealed jars for use during the winter months.

One of the things I trimmed was my peppermint. Ummm! The aromatic fragrance of freshly cut mint is just beautiful. But, instead of drying, I decided to make Mint Jelly (recipe follows), which only has five ingredients.

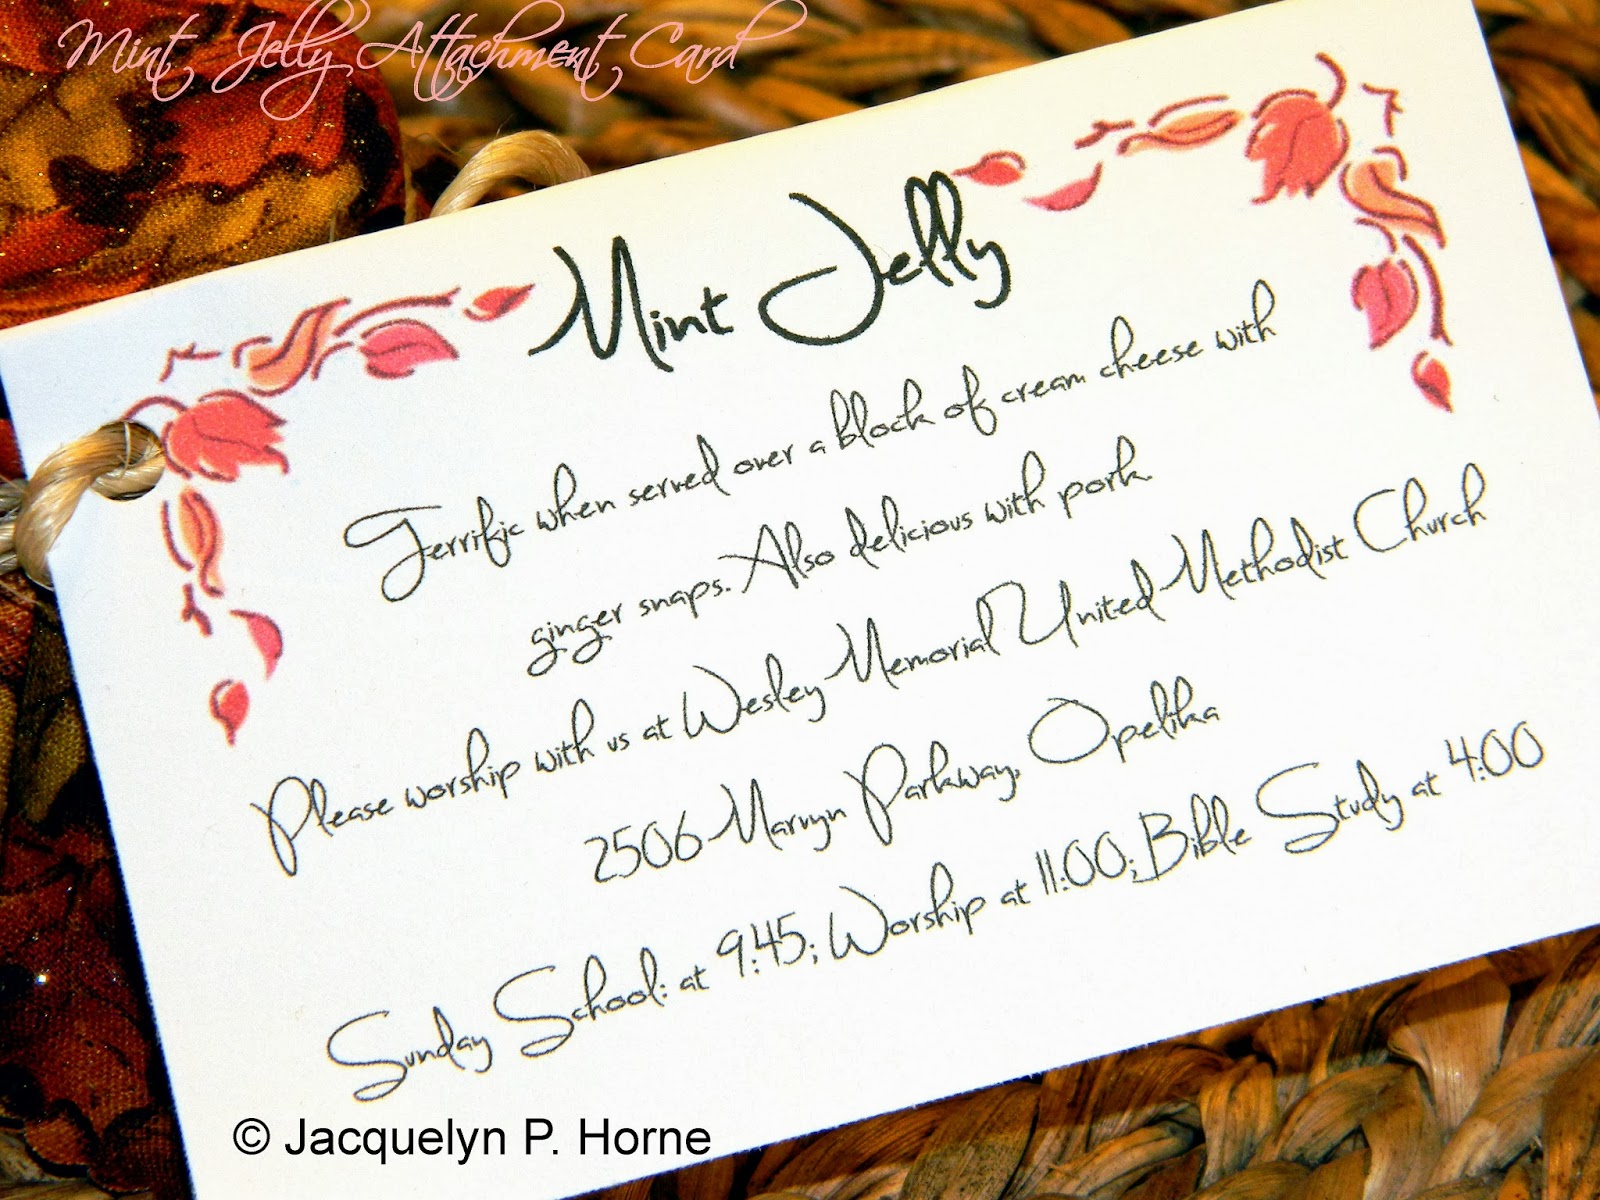
One question that was brought to me attention was “What are you going to do with so much jelly—peppermint jelly, to be specific?” Good question! Ah! I have the perfect answer. Gifts! With a little fabric topper in a pretty fall print tied with packing twine and a little gift card attached, you have a perfect hostess gift.

Remember that mint jelly is great with lamb or over cream cheese spread over ginger snaps. Enjoy!

Homemade Sun Butter

When asked about becoming a part of the outreach ministry for my church, I got to thinking about what I could share in addition to the words of Jesus with others. And because I am so keenly aware of the many, many folks with food allergies, some severe, in addition to those with diseases such as my husband's Celiac disease, I came up with a two part idea that is easy enough children can help. Use canola oil to eliminate all of the recognized allergens.

First, we will make Homemade Sun Butter (recipe follows). Second, the sun butter that is our gift along with a recipe for Sun Butter Cookies ( Click here for the recipe) which the family we are visiting can make with the their children and family. 

My Homemade Sun Butter is terrific on gluten free crackers or as a substitute in any recipe that calls for peanut or any other nut butter. My version is much cheaper than the store bought stuff and tastes better. Why does my Homemade Sun Butter taste better? Because it is made with love.

The attached card is easily made with any desk-top publishing program and a color printer, or hand write the recipe and simply add a fall sticker from the craft store.

Saturday, September 21, 2013

Smoky Ham and Bacon with Cheese Breakfast Quiche


Anything naturally gluten free is always a plus in my book, saving me the time and frustration of the trial-an-error of converting a traditional recipe to gluten free. A breakfast casserole is always a good choice when short on time. For us, a breakfast quiche is the perfect answer. I like to make up two or three, cook them and then put in my freezer just for those occasions when I don’t have time or feel like cooking. All you have to do is thaw, slice, heat and serve. And, when called on in a moments notice to produce a dish for someone else, you don’t have to think about time and energy.

Just look at the layers of delicious flavors all in one dish!
One of our favs is my Smoky Bacon and Ham with Cheese Quiche (recipe follows). With no crust, this one is naturally gluten free. Boy, when you combine bacon, smoked ham and cheese, you just about can’t get any better than this.


In addition to fab flavor, the terrific thing about this particular quiche is that it takes advantage of leftover ham or those few slices of bacon at the end of a package. Just about a perfect recipe!

Friday, September 20, 2013

Open Faced Mini Muffulettas

Finger foods are a natural for any party, get together, tailgating and the list goes on and on. One that we liked a lot with heavier wines from our the days of our wine tasting parties at The Brass Brassiere was our "Open Faced Mini Muffulettas". The flavors are heavy enough for more robust wine. Here's to you!

Friday, September 6, 2013

Chicken Fresca


I have a confession. Sometimes when stumped for something for dinner, I begin by “shopping” in my refrigerator and pantry. What do I have on hand that I can simply throw together, thus taking advantage of fresh veggies I already have on hand.

My Chicken Fresca (recipe follows) is just such a creation. Since I have a dedicated gluten free kitchen, you know this gorgeous dish is naturally gluten free. Just look at the quantity of quality food you are getting for only 260 calories—a really low calorie entrée in my opinion.

I couple this with my Easy Cheesy Risotto (Click link for recipe). The beauty of this winning combination is while the risotto cooks, you can prep and prepare the Chicken Fresca. Everything comes together at virtually the same time.

Here is my recipe:
2 6-ounce boneless skinless chicken breast
2 tablespoons olive oil
1 teaspoon Italian seasonings
3 each small (2 to 3 inch) tomatoes, quartered
1/2 cup sweet onion, diced
1/2 cup bell pepper, chopped
2 cloves garlic, chopped
1 cup fresh baby spinach, washed

Here is how I made this dish:
1. Place chicken breast flat on cutting board and slice crossways into 1/4 inch thick slices, set aside.

2. Place olive oil in cold skillet; add chicken breast slices, stirring to coat. Add Italian seasoning and stir.

3. Place skillet over to medium-high heat. Once chicken begins to sizzle, cook 2 minutes on each side.

4. Add tomatoes, onions, bell pepper and garlic. Reduce heat to medium and continue to stir frequently until onion begins to look translucent, about 4 minutes

5. Add spinach, stir until wilted, remove from heat, salt to taste. Serve immediately.

Servings: 4

Preparation Time: 15 minutes
Cooking Time: 10 minutes
Total Time: 25 minutes

Nutrition (per serving): 260 calories, 97 calories from fat, 11 g total fat, 78.5 mg cholesterol, 177.3 mg sodium, 950.7 mg potassium, 13.2g carbohydrates, 3.4 g fiber, 7.5 g sugar, 28.3 g protein.

Author: Dr. Jacquelyn P. Horne
Copyright: 2013


Monday, September 2, 2013

Refrigerator Chocolate Peanut Butter Balls


These little nuggets of goodness are so sweet and yummy, they truly make you feel pampered and naughty. These are absolutely divine with a cup of coffee or as a little side treat to a bowl of ice cream. But, they are so rich, they will take your breath away if you try to scarf them down. If someone cannot eat peanuts, feel free to substitute sun butter or almond butter. To cut the sweetness, you might like to substitute 1/2 or the granulated sugar with brown sugar. No matter how you cut it, these are to die for: I promise.

Saturday, August 24, 2013

Butter Pecan Pork Chops


Want something yummy and quick for dinner tonight? I have the perfect solution for you. My Butter Pecan Pork Chops are quick to get into the oven, moist and absolutely delicious. I plated them with heirloom tomatoes from my little backyard garden and my Brazilian Cheese Bread (click here for recipe) recipe.

I have a true confession here! I call this recipe mine, but my sweet hubby was actually the one who came up with this idea. We tweaked it a couple of times, and this is the final, perfected recipe.

You will notice that the nutritional information for this recipe is conspicuously absent. There is a very good reason. The program I use us calculate the nutritional information is based on data from USDA. However, the calorie count for pecans was incorrectly entered. Until I can manually update my ingredient list, I thought you would rather have this fab recipe without the nutritional information than wait for slow poke here is manually add and calculate this ingredient.

Enjoy!

Here is my recipe:
3 5-ounce pork chops, boneless
1/2 cup pecans, finely chopped
4 tablespoons butter
1 tablespoon cognac
1 teaspoon fresh sage, finely chopped
1/4 teaspoon kosher salt

Here is how I put this entrée together:
1. Preheat oven to 350 degrees Fahrenheit. While oven is heating...

2. While over is heating, melt butter in 2 cup measuring cup. Add sage and pecans. Mix well; set aside.

3. Prepare grill pan with rack by lining pan with aluminum foil (if desired) and spray rack with non stick cooking spray.

4. Put a thin layer of the pecan/butter mix on pork chops, place dressed side down on rack. Spread remainder of the butter/pecan mix on the top side of the pork chops.

5. Place chops in oven, cook 30 minutes or until juices run clear and internal temperature reaches 155 degrees Fahrenheit. Remove from oven, tent with aluminum foil for 5 to 10 minutes.

Author’s Note: Process pecans in food processor until approximately the texture of coarse ground corn meal.

Servings: 3

Preparation Time: 10 minutes
Cooking Time: 30 minutes

Author: Dr. Jacquelyn P. Horne
Copyright: 2013


Tuesday, August 20, 2013

Italian Sausage and Parmesan Stuffed Chicken Breasts


All of us are busy and are looking for ways to get a leg up on meal prep. One supper solution I have found is Italian Sausage and Parmesan Stuffed Chicken Breasts. This is a yummy entrée that can be frozen ahead of time, thawed in the fridge and then cooked as recommended.

For those of you who may be in college or have a child in college, especially if Celiac or have a gluten intolerance with access to a complete kitchen, this recipe is naturally gluten free—no weird gyrations or anything. Make a double batch, freeze and then pull out one at a time, making this recipe also a winner not just college students, but also for those who live alone.

Here, this entree is shown served over corn pasta topped with my Semi-Homemade Marinara Sauce (click link for recipe) . 

Sunday, August 18, 2013

Brazilian Cheese Bread (Pao de Queijo)


Brazilian Cheese Bread
My sweet husband took me to Fogo de Chao, a Brazilian steak house in Atlanta, for our anniversary dinner lastlast year. The server greeted us with a warm basket of rolls, which I have since learned is a Brazilian custom.
Hey, wait a minute! We can't do this, my husband must have a completely gluten free meal. The waiter and the chef assured us the rolls were gluten free cheese bread, completely safe for Rick to eat. And, they were alsolutely divine. 
To be specific, those rolls were so good, I decided to put on my detective cap and check into South American cuisine. I really wanted a recipe for that gluten free cheese bread that I make a pig out of myself over. With just the tiniest bit of looking on the World Wide Web, I had four or five recipes to choose among in no time. I will get back to that later, but in the process of finding a recipe for Brazilian Cheese Bread (recipe follows) I realized that a lot of the food prepared in that part of the world is naturally gluten free.

Saturday, August 17, 2013

Sausage and Bell Pepper Baked Pasta


With hints of fall already around—yes, a few leaves are beginning to turn just the slightest bit around the edges—I have begun to  crave somewhat a little heartier fare. You know the type. My Sausage and Bell Pepper Baked Pasta (recipe follows) tends to have that stick-to-your-bones flavor while still taking advantage of the tail end of summer’s bounty, bell peppers and fresh grown herbs. Be creative, using a variety of pepper colors.
 
I have found that this one keeps over a couple of days very well, reheating perfectly. I always add a couple of tablespoons of extra cheese prior to reheating. This recipe also lends itself to being baked in individual ramekins, elevating an ordinary dish to the level of exotic.

 Here is my recipe:
8 ounces corn pasta, gluten free
2 tablespoons extra-virgin olive oil
1 medium yellow onion, peeled and diced
2 teaspoons garlic clove, minced
1 15-ounce cans diced tomatoes
2 teaspoons fresh oregano, finely chopped
2 teaspoons fresh basil leaves, finely chopped
2 teaspoons fresh thyme, finely chopped
12 ounces Italian sausage (bulk)
1 large sweet bell pepper, finely chopped
1 cup mozzarella cheese finely grated

Here is how I put this recipe together:
1. Preheat oven to 275 degrees Fahrenheit. Coat 9 by 13-inch baking dish with gluten free non-stick cooking spray.

2. Bring large pot of water to boil over medium heat. Add pasta of choice; cook until less than al dente or about half the time. Drain and set aside.

3. While pasta is cooking, place olive oil in large skillet; heat over medium-high heat. Add onion and garlic; sauté for about 3 minutes or until slightly tender. Add tomatoes, Italian seasonings and cook for another 5 minutes. Remove from heat.

4. Place bulk Italian sausage in medium skillet over medium heat. Sauté until almost done or the gray stage .Add bell pepper and continue to cook until pepper is tender.

5. Place cooked pasta in prepared baking dish. Pour tomato sauce mixture over pasta. Top with cheese.

6. Bake until cheese is melted and lightly browned, about 30 minutes.

7. To serve, divide among 8 plates. add a side salad with desired dressing for a complete meal.

Servings: 8

Oven Temperature: 375°F

Preparation Time: 10 minutes
Cooking Time: 40 minutes
Total Time: 50 minutes

Nutrition (per serving): 483 calories, 79 calories from fat, 9 g total fat, 10.6 mg cholesterol, 557.6 mg sodium, 408.5 mg potassium, 86.7 g carbohydrates, 5 g fiber, 6.7 g sugar, 14 g protein.

Author: Dr. Jacquelyn P. Horne
Copyright: 2013


Thursday, August 8, 2013

Bacon Topped Cheese Ball


We all have a few try-and-true recipes we break out for every party. Folks come to look forward to enjoying these few nibbles a when invited to one of our gatherings. Bacon Topped Cheese Ball (recipe follows) is one of those dishes. i have never had this one to fail.
I often like to plan two or three smaller get-togethers close together. When I do that, instead of making one large cheese ball or log as you see in the picture above, I divide the mixture into two smaller ones. I never fail to get loads of compliments and requests for the recipe. Just be sure to have a variety of gluten free crackers or gluten free toasted baguettes available and watch this one disappear. 
Oh, did I tell you this recipe is naturally gluten free? It is, so there is no trying to figure out substitutions. Just enjoy a carefree evening with your guests.
Here is my recipe: 
8 ounces cream cheese, softened to room temperature
1/2 cup sour cream
4 cups shredded cheese blend
3 tablespoons onion flakes
3 tablespoons sweet pickle relish
1 tablespoon horseradish
1/2 teaspoon lemon-herb seasoning
6 slices bacon, fried crisp & finely crumbled
1/4 cup almonds, toasted and finely chopped
1 sprig fresh curly leaf parsley
1 tablespoon slivered almonds, lightly toasted
1/4 cup dried parsley

Here is I put this recipe together:
1. In the mixing bowl of an electric mixer, combine cream cheese and sour cream. Using the dough hook attachment beat cream cheese and sour cream until well blended. Add shredded cheese, onion, relish, horseradish, and garlic salt. Mix thoroughly. When mixture begins to form a ball, remove from mixing bowl and place on piece of plastic wrap. Using the plastic wrap, shape mixture into a ball. Cover and chill.

2. Thoroughly combine bacon, parsley and almonds. Roll cheese ball in bacon mixture. Store in tightly covered container in refrigerator until ready to serve.

3. Garnish with parsley and sliced almonds, if desired. Served with assorted gluten free crackers or baguettes.

Author’s Note: Will keep in refrigerator up to three days or will keep in freezer up to two months.

Servings: 16     Yield: 1 8-inch cheese ball

Preparation Time: 45 minutes
Inactive Time: 1 hour
Total Time: 1 hour and 45 minutes

Nutrition (per serving): 222 calories, 168 calories from fat, 19 g total fat, 44.5 mg cholesterol, 390.6 mg sodium, 125.6 mg potassium, 4.2 g carbohydrates, 1 g fiber, 2.2 g sugar, 9.5 g protein.

Author: Dr. Jacquelyn P. Horne
Copyright: 2013
Wednesday, August 7, 2013

Creole Veggie Dip

Feel free to adjust the amount of Creole seasoning to fit your taste buds. Be sure to have lots to drink on hand as this one tends to make folks thirsty. This was always a personal favorite because it is just so easy, and this was the one exception when I would purchase precut veggies so that start to finish was less than 10 minutes. Just throw into a cooler packed with ice, and you are good to go.

Tuesday, July 23, 2013

Lamb Burgers


 All flavorful; all nutritious; all good for you; and, all gluten free! Just look at how amazing this summertime plate looks! Here this burger is served with my Lemon  Herb Mayo Spread (click for recipe).